 |
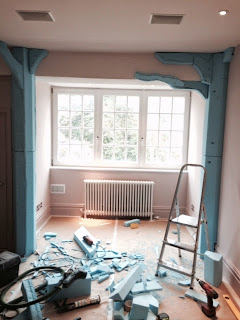
| The lovely Barry and Sam now attached ropes to the tree columns. These would become branches. They were all drilled into place to secure them. |
 |
| Then we covered each rope branch in more hessian and plaster. It drys quite quickly so it doe ant take too long, especially when you get help! Thanks to Sam and Savyna. |
 |
| the trees are done and I'm quite tempted to keep them white. they look incredibly still and magical just like this. |
 |
| We then got down to painting. First a light wash of a dark brown, followed by a thicker paler green and finally using sponges we dappled the bark in lilac and pinks |
 |
| one side... |
 |
| and the other... |
 |
| we then bought plastic leaves and dappled them in more autumnal shades |
 |
| we added fairy lights from home base and connected them to the 5amp system so they would come on when the lights were turned on. |
 |
| I then bought net butterflies from DZD a fantastic shop in London which sells shop and display decorations. I bought their white net ones and decided to dye them with watercolour inks. |
 |
| I also bought feather flying birds, net ladybirds and tiny robins to add to the tree. i added these using a glue gun. |
 |
| We also dabbed paint onto the wire of the fairy lights just to conceal them a bit. |
 |
| A few more leaves and the trees were finished. |
 |
| We finally gave Mini's old bed a lick of pink paint from The Paint and Paper Library and her Fairy Forest was finally finished. |
 |
| I worked with my carpenter on designing the cupboard, dresser and Toy unit and then had them custom sprayed in a selection of Paint and Paper Library colours. |
 |
| The wicker linen lined baskets i bought from The Holding Company which makes for easy storage and Mini can just pull them out and start playing. |
 |
| I also used a table and chair set from Aspace and just painted that my own colours too. |
 |
| Mini's curtains finally arrived yesterday. A gorgeous linen with trees and flowers and leaves adorning it. Making her bedroom a truly Fairy Forest fantasy. |


What an amazing room...truly magical! My daughter would absolutely love this x
ReplyDelete